This tutorial is a companion to the forehand loop vs block – side view tutorial, but showing a front view perspective instead. Rather than repeat much of the side view version, I’ll just be pointing out items that are relevant to the front view.
Ready Position
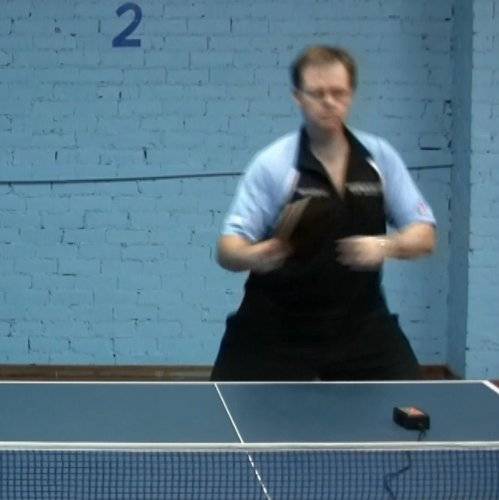
© Greg Letts
Points to look for:
- The player is shown in the middle of a forehand loop vs block drill, and he is currently transitioning from the recovery to his ready position straight into the preparation for his next stroke. This is a common occurrence during a match, where under pressure the player will blend his recovery process together with his preparation process.
- The free arm is already starting to point towards the player’s right, in preparation for the upcoming stroke.
- A robot was used to feed the ball in this sequence, and was set to a medium speed with light topspin to simulate a block landing mid-table.
Beginning Of Backswing
© Greg Letts
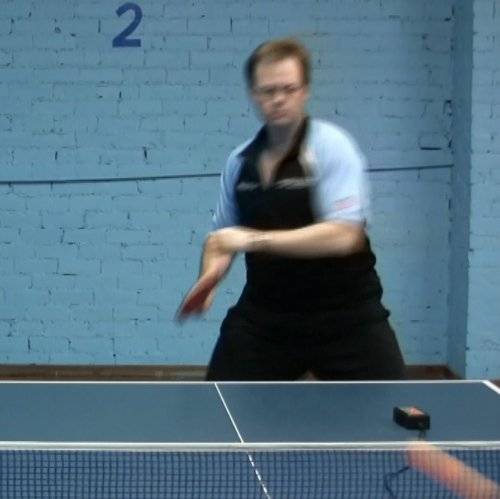
The ball is coming to the forehand side and the decision has been made to play a forehand loop. The backswing begins the stroke.
Points to look for:
- The player’s hips, waist and shoulders have turned to the right, although his head is still facing forward watching the ball.
- The free arm has continued to move to the player’s right, as the player begins to point his left shoulder towards the approximate location where the ball will land on the table. This “pointing the shoulder” technique is a common practice used by players to ensure a good shoulder turn.
- The racket has been dropped a little, but the racket has only been moved backwards by the turning of the body and shoulders, not by moving the right arm around the shoulder joint.
End Of Backswing
© Greg Letts
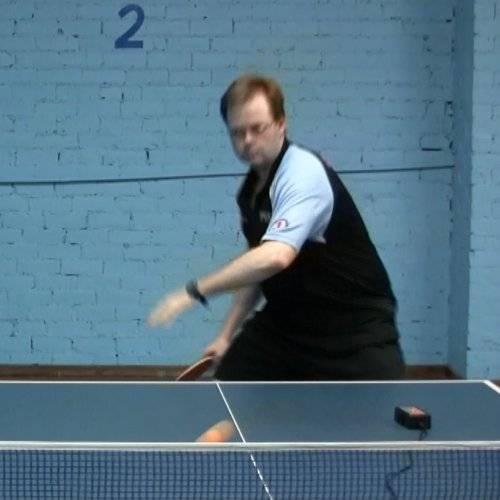
The ball has just bounced on the table, and the backswing has finished.
Points to look for:
- Much of the body weight has been transferred onto the right leg. This will allow the player to turn his hips, waist and shoulders to the right and then back to the left without losing balance. Notice that the shoulders have turned more than the hips and waist.
- The free arm has continued to move to the right via the turning of the body, and the left shoulder is now pointing at the ball’s bounce location.
- The right shoulder has dipped slightly more than the left shoulder, and the racket hand has continued to drop into position behind the right leg.
- The forward tilt of the racket is evident from this perspective. The racket has also been slightly cocked back by the wrist in line with the edge of the racket, as much as is comfortable with the standard shakehand grip.
Start Of Forward Swing
© Greg Letts
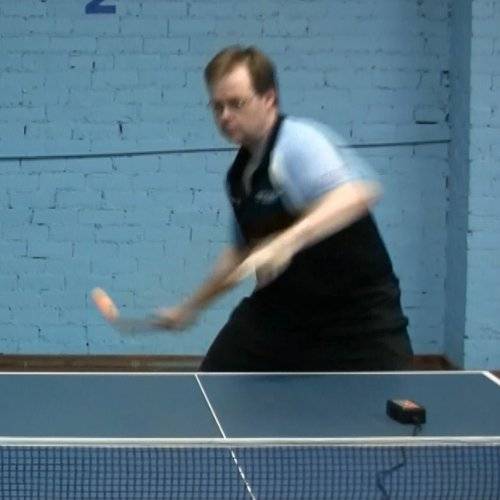
The ball is moving towards the player, and the player is beginning his forward swing.
Points to look for:
- The player has begun his forward swing by pushing off with his legs and turning his hips and waist back towards his left. He has also started to move his left shoulder to his left, using his free arm to increase the speed of his rotation. The comparatively still position of the right shoulder indicates that the right shoulder and arm are lagging a little behind the rest of the body turn, which is a common technique used by advanced players to increase the power and spin in their forehand loop.
- The racket has already been brought upwards and to the player’s right, moving towards the ball’s flight path.
- The player is continuing to watch the ball closely.
Pre-Contact With The Ball
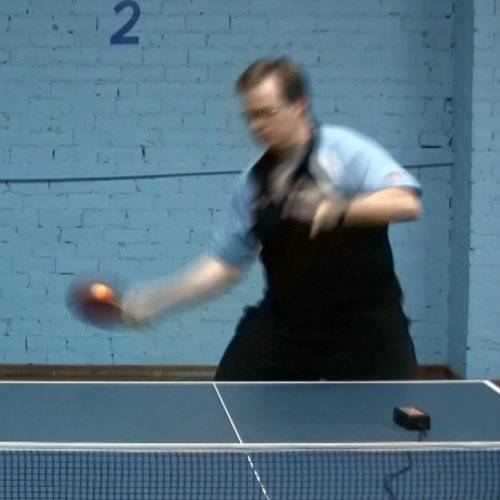
© Greg Letts
The player is about to make contact with the ball.
Points to look for:
- The waist, hips and shoulders have continued to turn to the player’s left, and the player is now turning his right shoulder to the left as well, as he begins the process of allowing his right arm to catch up to the rest of his body turn, thus increasing the speed and spin he can generate.
- The player is mainly swinging around the right elbow, as shown by the increased blurring of the racket and right forearm in comparison to the right upper arm.
- At this point in the stroke, the player’s upper body is still leaning slightly forward and to his right, with the right shoulder still a little lower than his left shoulder.
Contact With The Ball
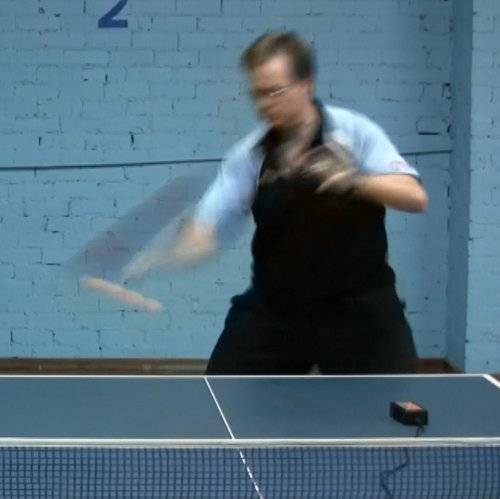
© Greg Letts
The player has made contact with the ball.
Points to look for:
- The player has watched the point of contact with the ball closely.
- The forearm and bat are moving faster than the shoulders, as shown by the heavy blurring of the racket head, medium blurring of the right forearm, and small blurring of the right upper arm. In comparison, the rest of the body is fairly still.
- If the ball was compared to a clockface, the bat has made contact at a point roughly around the number 10, while the bat was moving forwards and upwards. Note that the angle of the bat remains as constant as possible until after contact.
- The ball has been hit with high speed (as shown by the blur trail) and spin, and because the ball was taken well above the net, it has been hit forwards and slightly downwards.
Middle Of Follow Through
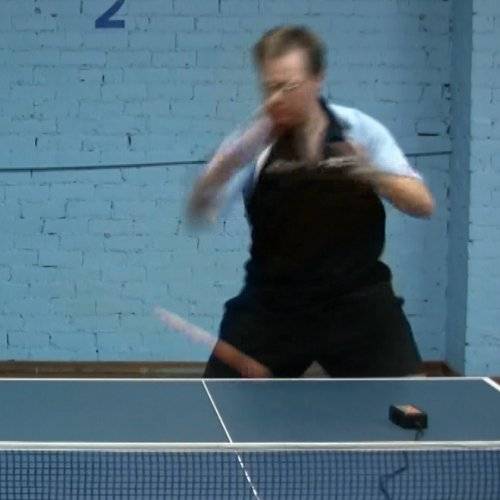
© Greg Letts
The ball has been struck, and the player is in the middle of his follow through.
Points to look for:
- The playing arm has bent at the elbow, so that the tip of the racket is now pointing upwards. This is the motion called the ‘salute’. The right elbow has lifted a few inches during this phase.
- The shoulders have begun to level out a little more.
End Of Follow Through
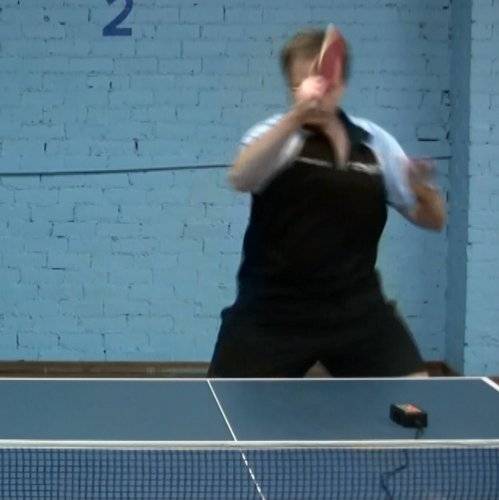
© Greg Letts
The forward swing has come to an end, and the ball is on its way.
Points to look for:
- The player has made a powerful swing, and due to this he has overshot a little in his rotation towards his left, with the right side of his body now slightly in front of the left side. This is normal when a player is making a very powerful shot, and a good player will still have plenty of time to recover to a true neutral ready position.
- The elbow of the playing arm is a little below shoulder level, and the bat has not crossed past the middle of the body. This helps to maintain balance and improve recovery time.
- The player’s shoulders have also continued to tip towards his left, and now the right shoulder is a little higher than the left. This is particular to this particular player, some players will have very little tipping of the shoulders during the stroke, and others will have a little more. All things being equal, less tipping is better than more tipping of the shoulders, since it will affect the swing path less.
Start Of Return To Ready Position
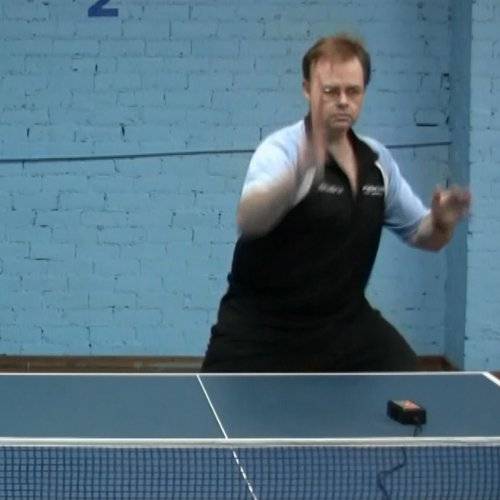
© Greg Letts
The player is beginning his return to his ready position, and is now watching his opponent (or in this case, the robot feeding the balls) to see what is going to happen next.
Points to look for:
- The player has completely finished his body rotation to his left, and is now about to start turning to his right, back into a neutral ready position.
- The racket is being dropped vertically back into position, and the blade is being held vertically to allow the player to play a forehand or backhand with equal ease.
- The right elbow is also being lowered straight down, as part of the racket lowering process.
Return To Ready Position
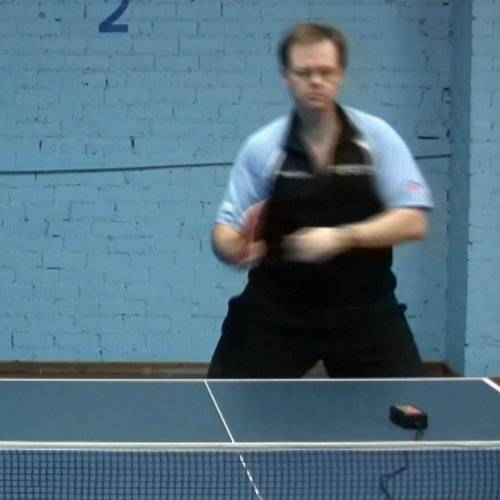
© Greg Letts
The player is transitioning into the preparation phase of his next stroke.
Points to look for:
- The arms have dropped towards their ready position. The bat is in a slightly forehand angle, since the player knows the robot will be sending the next ball to his forehand, and he can afford to “cheat” a little with his racket preparation.
- His body weight is again evenly distributed between both legs, and he is on the balls of his feet.
- By this stage, the player has already turned his body back towards his right, and has once again returned to his basic ready position with his right shoulder slightly lower than his left shoulder.

