This step by step explanation of the front view of a backhand counterhit is a companion article to the Backhand Counterhit – Side View article, so I will focus on discussing those aspects relevant to the front view, rather than just repeating all the same information.
In the backhand counterhit against light to medium topspin, the idea is to hit the ball over the net with medium speed and a little topspin to help bring the ball down on the other side of the table.
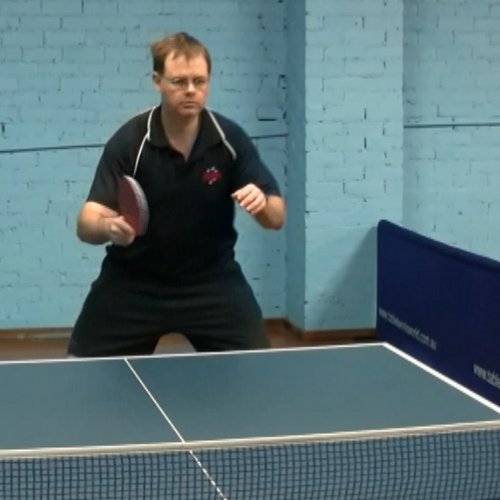
Ready Position
© Greg Letts
Points to look for:
- The feet are placed several inches wider than the shoulders, to lower the player’s center of gravity and bring him closer to the height most balls are played at.
- The arms are held roughly shoulder width apart, with around a 90 degree angle at the elbow. The bat should be above the table to allow easy stroking of short balls.
- The photograph captures the player as he is moving towards his ready position for the next stroke. Since he is performing a backhand drill, his racket is in a slightly backhand position. If he was playing a match where he did not yet know the location of his opponent’s shot, his racket would be pointing a little further to the player’s right, in order to maintain a neutral ready position, where forehand and backhand could be played with equal ease.
Start Of Backswing
© Greg Letts
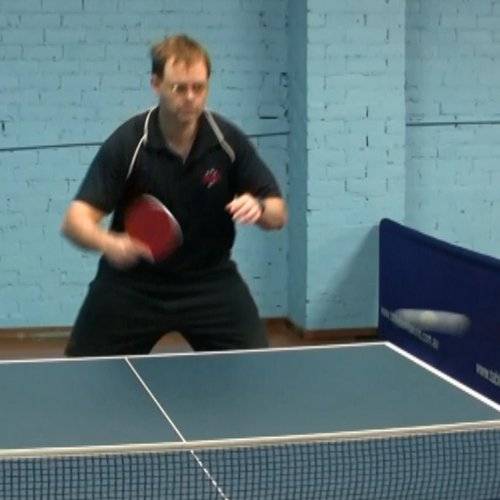
The ball is coming to the backhand side and the decision has been made to play a backhand counterhit. The backswing begins the stroke.
Points to look for:
- The right elbow is moving out to the player’s right and a little forwards, in order to give the player enough room to make contact with the ball between his left hip and middle of his body.
- The playing hand is starting to move backwards and downwards, into a position that will be several inches below the intended height of the ball at contact. This will allow the player to swing forwards and upwards when making contact.
- The player is still judging where the ball will land, and has just started to move a little to his right to position himself in the optimum location.
- Note that there is very little turning of the waist and shoulders throughout this stroke, since the swinging of the bat around the playing elbow provides enough power.
Middle Of Backswing

© Greg Letts
The ball is about to land on the table, and the player is in the middle of his backswing.
Points to look for:
- The player has continued to move sideways to his right, and has also lowered his body a little. This has been achieved by leaning towards his right, rather than actually moving his feet. The use of leaning allows quicker movement in comparison to stepping sideways, and also keeps the head more stable. However, the legs need to be widely spaced apart in order to allow the player to lean and stay balanced, and then recover quickly. The player’s center of gravity should not shift too far towards his right leg, or else his balance and recovery will be compromised. This is one reason why the feet should not be kept close together.
- The playing elbow has moved into a position several inches to the side of the player’s torso, and several inches in front of the player’s body as well. This gives the player plenty of room to swing the bat backwards without hitting his mid-section. The player also is leaning forward to maintain balance and give a little extra room for his backswing, if required.
- The racket is pointing almost sideways, and has been brought into line with the direction the ball is moving. If the player was going to use more wrist (such as in a backhand loop), the racket tip would be pointing more towards the ground.
- Note that the wrist has not been cocked backwards. This is because the player is not using the wrist to change the direction of the stroke, but is returning the ball in the same direction it came from. If the player wished to play his stroke cross-court, he could either cock his wrist backwards and then snap it forwards to change the racket angle, bringing the tip in front of the handle, or he could bring his racket into a position that is several inches to the the right of the ball (the viewer’s right), angle his bat directly at the target across court, and then swing at his target without cocking his wrist, or even use a combination of both techniques. The first technique is easier to hit the ball with, but harder to accurately place the ball due to the ever changing wrist angle. The second method is a little more difficult to hit the ball when under pressure since the ball is being intercepted by a bat that is not always in its direct flight path, but easier to precisely place the ball in a desired location, since the racket angle is consistent throughout the stroke.
End Of Backswing
© Greg Letts
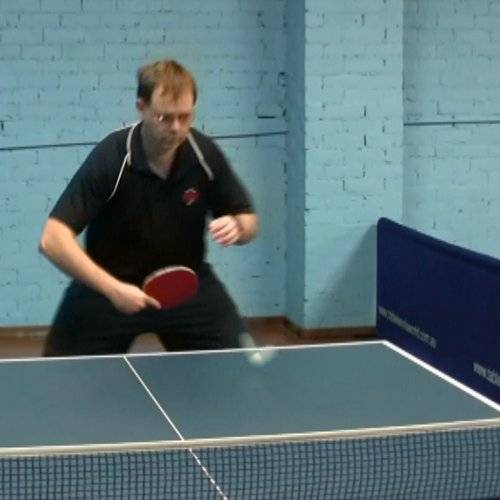
The ball has bounced on the table, and the backswing has finished.
Points to look for:
- The player’s right elbow is now in position for the forward swing, which is why it is now in sharp focus.
- The player is watching the ball right onto the bat.
- The player looks comfortable and well balanced, even though a little more of his body weight is on his right leg than his left.
Pre-Contact With The Ball
© Greg Letts
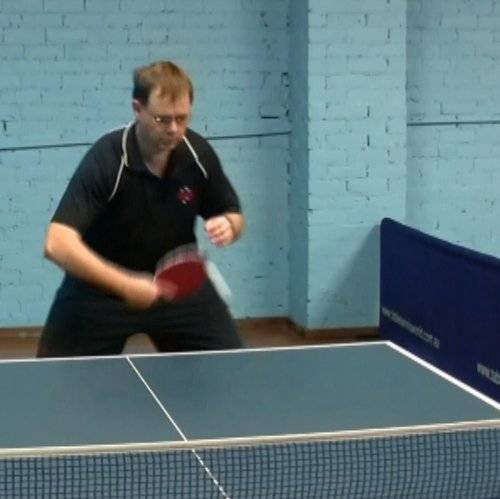
The player is about to make contact with the ball.
Points to look for:
- As shown by the blurred flight path of the ball, the player is going to make contact well before the peak height of the ball’s bounce. This is because the player wants to make contact at the most comfortable height for his swing. Taking the ball at its peak would require the player to move further away from the table (which he may not have time to do), and make contact at a point higher than he would find desirable.
- It is apparent that contact will be made between the player’s left hip and middle of his body, not out to the side of the player’s body as in the forehand counterhit.
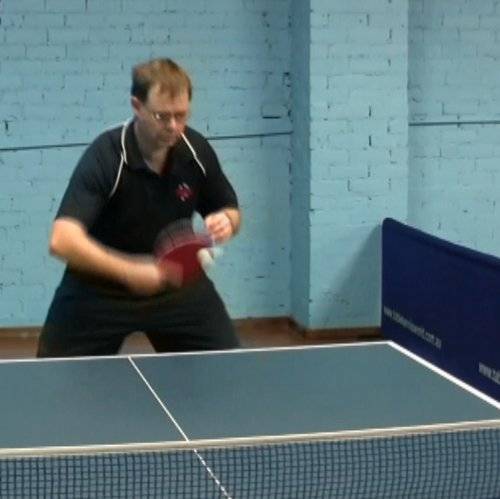
Contact With The Ball
© Greg Letts
Contact has been made with the ball.
Points to look for:
- The player has watched the bat contact the ball. (Well, obviously he can’t actually see the contact, since the racket is in the way, but you know what I mean!)
- It is possible to see how the forward tilt of the racket produces a ball flight that is forward, not upwards, even though the player has swung his racket forwards and upwards.
- Note that the player’s right elbow has hardly moved at all up to this point of the forward swing. The right hand has been swung around the elbow joint. The free arm has not been moved throughout the stroke.
- Also note the relative stillness of the player’s head and torso at contact. This indicates the player is well balanced and maximizes his chances of playing a successful stroke.
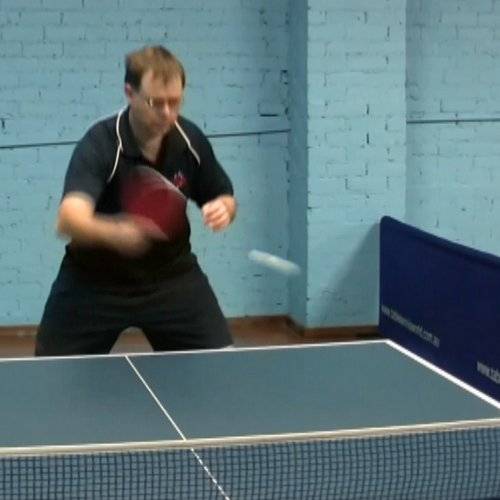
Start Of Follow Through
© Greg Letts
The ball is now on its way, and the player is beginning his follow through.
Points to look for:
- The player’s right elbow is starting to lift a little, as the racket is reaching the end of its forward motion, and is now beginning to move a little sideways.
- The playing elbow is also being lifted by the player straightening his torso again, as he begins to return to his ready position.
- The racket tip is starting to point upwards, as the bat continues to rotate around the elbow joint.
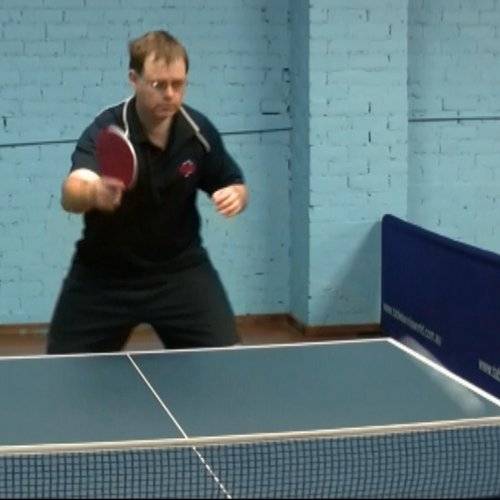
End Of Follow Through
© Greg Letts
The forward swing has come to an end, and the ball is on its way over the net.
Points to look for:
- The racket has finished approximately where it started in terms of position relative to the left/right perspective of the camera, although several inches higher up and several inches further forward, due to the upwards and forwards motion of the swing. Note that the follow through is lower than the shoulder, since the stroke was not a very powerful stroke requiring a large follow through.
- The tip of the racket is now pointing upwards, indicating that the player used a little wrist during the stroke.
- The player has continued to straighten his torso, and is just beginning to push off his right leg towards his left, in order to return to a balanced body weight position.
Return To Ready Position

© Greg Letts
The player returns to his ready position before the next stroke.
Points to look for:
- Since the player is performing a backhand drill, he knows the next ball is coming to his backhand, and he is “cheating” a little by moving towards a backhand orientated ready position, where his racket tip is already pointing slightly to his left, instead of a true neutral ready position, where his racket would be pointing almost straight down the white centre line of the table, given his current location.
- The player has finished pushing off his right leg, and is now back in a position with evenly distributed body weight. The player will continue to lower his racket a few more inches as he moves towards his final ready position, but notice how he is perfectly balanced to move in any direction that is required.

